How to backup my files in cPanel using G1 BACKUP
Required Information
To back up your website, you are going to need the following information:
- Website URL
- Hostname/IP address
- SFTP/FTP username
- SFTP/FTP password
- Port number
The steps to take to obtain this information are different for each hosting provider. Typically you will get an email from your hosting provider with this information when you first sign up, but if you aren't sure what it is or how to find it, please contact your hosting provider.
- Step 1: Log in
Once you've gathered your information, log into your G1 account and click "Add FTP/SFTP Website."

- Step 2: Enter your credentials
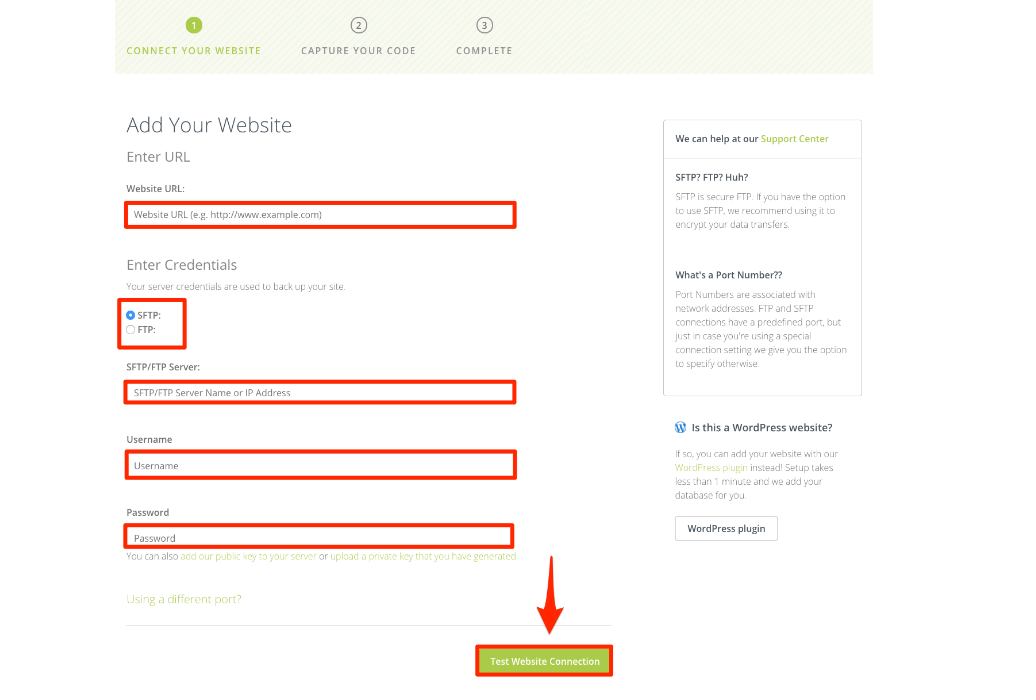
Using the credentials you gathered earlier, enter them in the appropriate box. An explanation of each field will follow the screenshot

- Website URL: The URL of the website you are adding
- Protocol: Select SFTP or FTP depending on the protocol you are using to connect. The default port for SFTP is 22, and the default port for FTP is 21. If you are using a different port than either of those, click "Using a different port?" and enter the correct port.
- SFTP or FTP Server: The hostname or IP address of your SFTP or FTP server
- User Name: The SFTP or FTP username
- Password: The SFTP or FTP user's password
Once you've entered your credentials, click "Test Website Connection". If the credentials you entered are correct you will be brought to the next step.
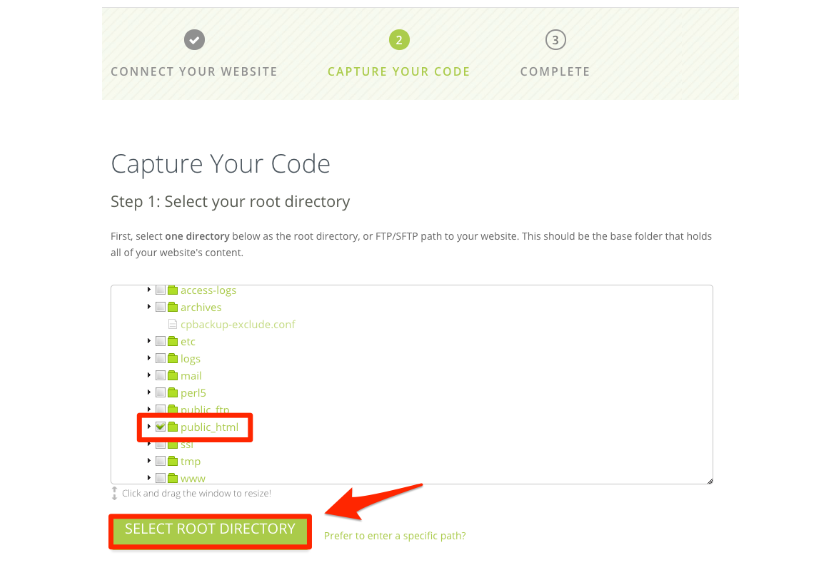
- Step 3: Select root directory
Click the checkbox next to the directory you would like to be your root directory. We recommend you choose the directory that contains all files you would like backed up. Keep in mind that any new files/folders added to your root directory in the future will be added to your backups. Once you've selected it, click "Select Root Directory."

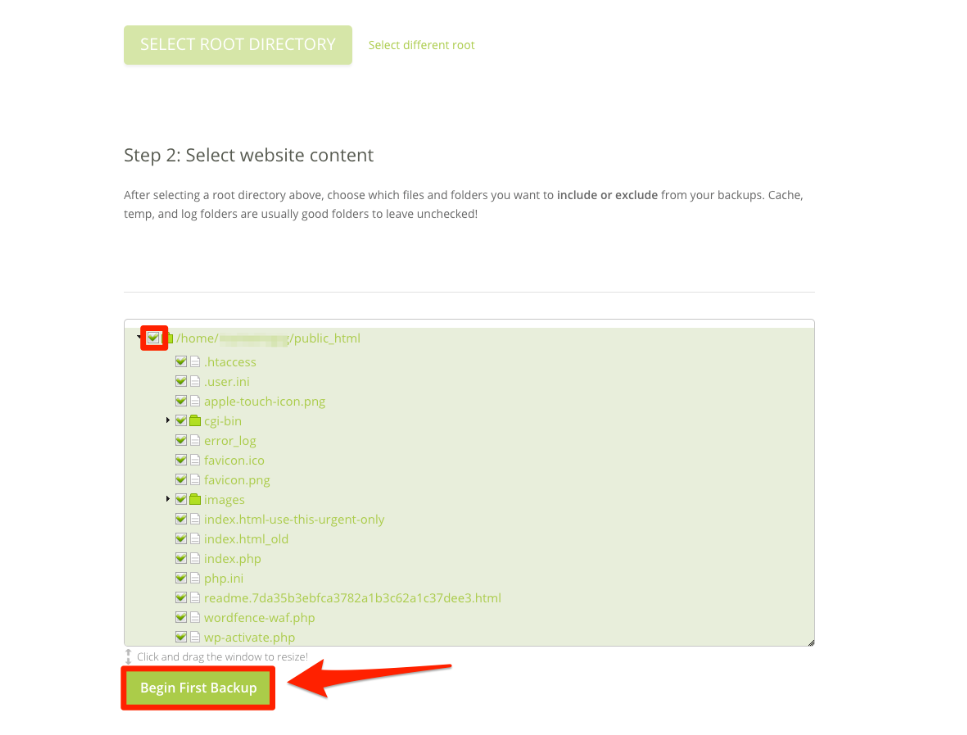
- Step 4: Select content to back up
Scroll down to the next section and select the content that you would like backed up. To select everything inside your root directory, simply click the checkbox next to your root directory. Selecting any folder will automatically include its entire contents. Then click "Begin First Backup."

Your website backup has now begun! You will next be prompted to add a database. If you have a database associated with your website it is very important to back up your database as well.
Please click on the link below with G1 Database Backup Walkthrough and follow the steps provided on how to add your database to your backup file
G1 Database Backup Walkthrough
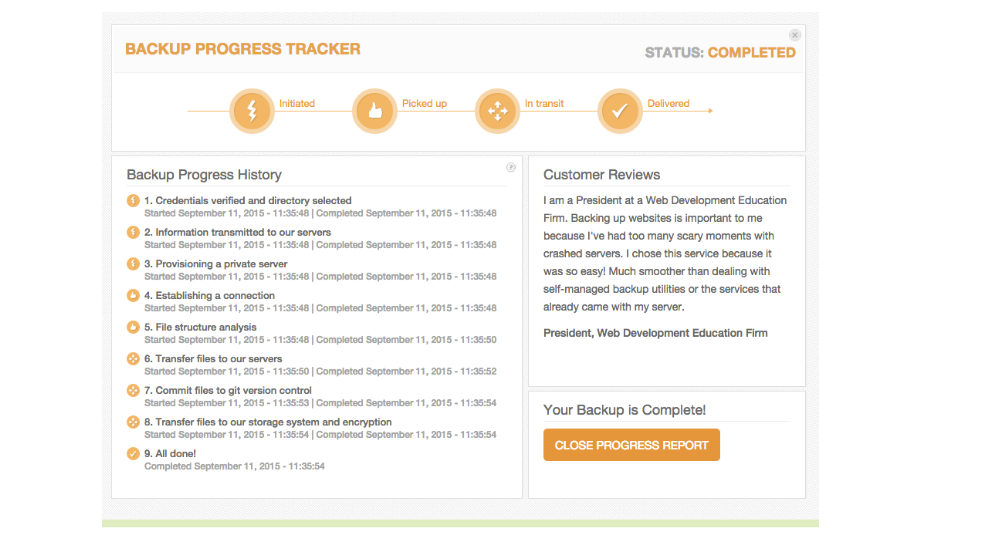
Back on your dashboard, you will see a progress tracker that will indicate the status of your initial backup. When the backup is complete, it will look like this:

If you have any questions about this process don't hesitate to contact our friendly support staff.